Problem
You got a Kubernetes! Your Vsphere team has given you access to a Vsphere Workload Management Namespace, which means you can start making clusters! But how, exactly? Assuming they didn't give you enough directions, how do you from 'access' to 'I have a Kubernetes workload!' ?
Solution
At a high level, you'll need to log into the Supervisor cluster built into Vsphere. After doing that, you can target the supervisor namespace created for you and get to work creating clusters and using them.
Download the Vsphere plugin for kubectl
You should have received a URL where you can download binaries as well as log into the Supervisor cluster. These are often the same URL. For this post, we'll go with the URL wcp.vmwsddc.lab. Navigate there in your browser and download the kubectl and kubectl-vsphere binaries and put them on your path.
Create a workspace for interacting with Vsphere with Kubernetes
NOTE: If you're just getting started with k8s clusters and don't have any $KUBECONFIG configured and you're not working with any k8s clusters right now, feel free to skip this section.
I like to keep things clean, so I use direnv to manage access to multiple k8s clusters and other environments. I have a directory dedicated to working with Vsphere with Kubernetes. Here's a snippet of the relevant part of my .envrc
# Use vsphere kubectl plugin
export PATH=$PWD/bin:$PATH
unset  KUBECONFIG
In my workspace directory, I keep a separate /bin directory, where I store the kubectl version I want to use and the vsphere plugin.
.
├── bin
│   ├── kubectl
│   ├── kubectl-vsphere
│   └── vsphere-plugin.zip
├── dmalone-k8s-test-01.yml
└── sample-workloads
    ├── hello-k8s.yml
    ├── nginx-deployment.yml
    ├── nginx-lb-pod.yml
    └── nginx-nodeport-pod.yml
This way, I don't affect any other parts of my system and I guarantee the right version of kubectl gets used.
Log into supervisor namespace and change context
Using the binaries you just downloaded, log into the Supervisor cluster. This will likely be the same URL where you downloaded the binaries.
kubectl vsphere login --insecure-skip-tls-verify --server=wcp.vmwsddc.lab

Username: dmalone
Password:
Logged in successfully.

You have access to the following contexts:
   supervisor-ns-01
   wcp.vmwsddc.lab

If the context you wish to use is not in this list, you may need to try
logging in again later, or contact your cluster administrator.

To change context, use `kubectl config use-context <workload name>`
Upon successful login, you'll see all the Supervisor namespaces you have access to. In this case, we have access to the supervisor-ns-01 Supervisor namespace. This is the namespace we'll talk to in order to create our workload clusters.
kubectl config use-context supervisor-ns-01
A note: up until now, I've been referring to wcp.vmwsddc.lab as the "Supervisor cluster". That's because this is the cluster that is ultimately responsible for creation/management of your workload Kubernetes clusters. When you target supervisor-ns-01, you're targeting the namespace carved out for you and your team. This is the "Vsphere Workload Namespace" that your Vsphere admin made for you, and is where permissions, quotas, etc are controlled from.
Make a Kubernetes
Every Vsphere environment has its own properties and characteristics. To keep things as simple as possible, let's start with a simple, generic k8s cluster just to get off the ground.
# test-k8s-01.yml
apiVersion: run.tanzu.vmware.com/v1alpha1               # TKG API endpoint
kind: TanzuKubernetesCluster                            # required parameter
metadata:
  name: test-k8s-test-01                                # cluster name, user defined
  namespace: supervisor-ns-01                           # supervisor namespace
spec:
  distribution:
    version: v1.17                                      # resolved kubernetes version
  topology:
    controlPlane:
      count: 1                                          # number of control plane nodes
      class: best-effort-small                          # vmclass for control plane nodes
      storageClass: vsan-default-storage-policy         # storageclass for control plane
                                                        #   use 'kubectl describe namespace SUPERVISOR-NAMESPACE'
                                                        #   to find the storageClasses available to you
    workers:
      count: 3                                          # number of worker nodes
      class: best-effort-small                          # vmclass for worker nodes
      storageClass: vsan-default-storage-policy         # storageclass for worker nodes
For more on example yaml files and guidance, see the Docs
With that, and with our Supervisor namespace targeted, let's fire!
kubectl apply -f test-k8s-01.yml
You can check on the status just as you would any other Kubernetes object, with kubectl (get | describe). For instance, here's a successful cluster created:
kubectl get tanzukubernetesclusters
NAME                  CONTROL PLANE   WORKER   DISTRIBUTION                     AGE   PHASE
test-k8s-01           1               3        v1.17.8+vmware.1-tkg.1.5417466   20h   running
Log into your Kubernetes and deploy!
Upon successful creation (i.e. you can list your cluster and get output similar to the above), you can now target that k8s cluster and get to work.
# log in to the cluster
kubectl vsphere login --insecure-skip-tls-verify --tanzu-kubernetes-cluster-name=test-k8s-01 --server=wcp.vmwsddc.lab

# target the cluster
kubectl config set-context test-k8s-01
Let's deploy an Nginx pod and expose it using a load balancer:
# nginx-with-lb.yml
apiVersion: v1
kind: Pod                      # this is our pod
metadata:
  name: static-nginx        # the name that appears in a 'kubectl get pods'
  labels:
    app: web                   # we use this label when configuringg the LB below
spec:
  containers:                  # the container going into our pod
    - name: web
      image: nginx             # pull the latest nginx container from the default registry
                               # (Dockerhub, by default)
      ports:
        - name: web
          containerPort: 80    # open port 80 because that's where nginx will listen
          protocol: TCP
---
apiVersion: v1
kind: Service                  # this is our service
metadata:
  name: hello-kubernetes-lb
spec:
  type: LoadBalancer           # you can choose the type. "LoadBalancer" will trigger k8s
                               # to create an external load balancer for us, giving us an
                               # accessible ip/url we can use.
  ports:
  - port: 80                   # this is the port that the LB will listen on

    targetPort: 80             # this is the same port 80 that our Nginx pod is listening on. This
                               # needs to match the 'containerPort' above.

  selector:                    # this is how we tell k8s to put our service in front of our Nginx pod.
    app: web                   # this must match the "app: web" label above
And now deploy:
kubectl apply -f nginx-with-lb.yml
You should now see your pod successfully deployed, along with its service. Because we're using Vsphere and we asked for a service of type LoadBalancer, Vsphere will give us an IP that we can use that will connect us with our pod.
Check with kubectl get pods or, even better, use the k9s command line tool for some of the best k8s experience you'll have today.
NOTE: You will need to be patient when waiting for the service to create, especially if this is the first time you're creating a service. It can take upwards of a few minutes to give you an IP for your service, depending on your environment.
# show pod
kubectl get pods
NAME READY STATUS RESTARTS AGE
static-nginx 1/1 Running 0 3h5m
# show service
kubectl get svc
NAME TYPE CLUSTER-IP EXTERNAL-IP PORT(S) AGE
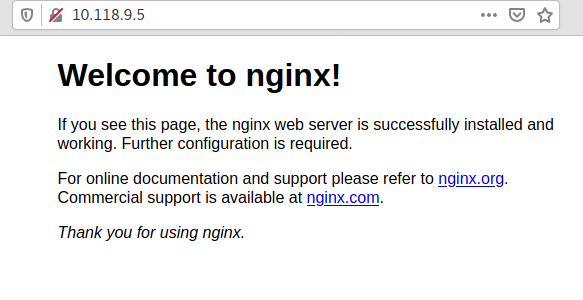
hello-kubernetes-lb LoadBalancer 10.110.115.57 10.118.9.5 80:31682/TCP 20h
You can safely ignore the random port (in this case, 31682). That's the internal port assigned to the service inside the Kubernetes cluster and it was chosen by Kubernetes. You won't need it.
In this case, the IP we were given is 10.118.9.5. Let's plug that into our browser.
There are many ways to go from here (ingress, configuring container registries, and more) but they're beyond the scope of this post. Enjoy your new pushbutton Kubernetes and get to work!